In my previous blog I have described about How to use custom form for Single Pattern (Blueprint) for Widows and Linux and add additional resource during deployment.
For Linux VM we need to create DNS entry manually in DNS server. In this blog I am going to describe how to use a vRealize Orchestrator workflow to add a DNS entry when vRealize Automation deploys a VM.
We need to preform below activity to accomplish the DNS entry for VM.
1-Prepare Your PowerShell Host
2. Connect Your PowerShell Endpoint in vRealize Orchestrator
3. Import and Modify a YAML Blueprint to Create an VM and we use network profile for ip address.
4 Create workflow
5. Wait for the Data Collection
6. Create a Subscription
7. Deploy Your VM (RHEL) System
Prepare Your PowerShell Host :-
You can use PowerShell to run a command that adds a DNS entry to the DNS host.
First you need to login on your DNS server and install Winrm. Once Winrm install then need to configure.On the DNS server desktop, open a command prompt and Enter winrm quickconfig.

Enter winrm set winrm/config/service/auth @{Basic=”true”}.
You must enter {} and not parentheses with the Basic="true" parameter

Unencrypted communications indicate that vRealize Orchestrator can use the HTTP protocol instead of HTTPS to communicate with the PowerShell host. Encrypted communications require an exchange of valid digital certificates
Enter winrm set winrm/config/service @{AllowUnencrypted=”true”}

Close the command prompt on the DC desktop.
Click the Windows Start menu icon on the DC server
Click the Windows PowerShell ISE icon.

Enter set-execution policy bypass and click Yes

Note :- A bypass execution policy in PowerShell allows vRealize Orchestrator to send commands to this Windows server without scripts signed by digital certificates. This policy is acceptable for lab or test environments. Production systems must always use valid digital certificates that trusted certificate authorities sign.
Close the Windows PowerShell ISE pane.
Now Close Remote Desktop Connection Manager.
Connect Your PowerShell Endpoint in vRealize Orchestrator :-
You connect vRealize Orchestrator to the PowerShell host so that workflows can run PowerShell commands.
You need go on login page then on Orchestrator.

Click the Orchestrator Client tab.
Go to Library > Workflows then Enter add in the Filter text box and Enter powershell in the Filter text box to give a second filter.

Click RUN in the Add a PowerShell host workflow catalog .
Fill out below information

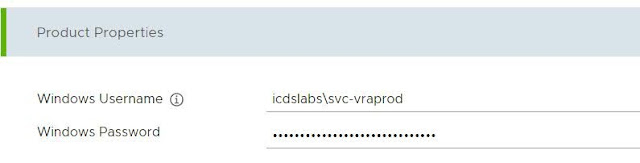
After you enter the Name, Host / IP, and Port information, click the User Credentials tab.
Enter the User Credentials information.

You do not have to use a domain controller as your powershell host but I have configure in my lab .
Click RUN.
Verify that the Add a PowerShell Host workflow runs successfully and ends with a status of Completed.

If your workflow run fails, click RUN AGAIN and verify your inputs.
Once workflow run successfully then click close.
Create YAML Blueprint That Creates an VM :-
I have used same bule print which I have created in my previous blog.
Here is YAML code.
name: Randhir_VM
version: 1
formatVersion: 1
inputs:
MachineName:
type: string
title: Name for the VM
description: Enter the VM name
os-image:
type: string
oneOf:
- title: MTO-PROD-LIN7
const: MTO-PROD-LIN7
- title: MTO-PROD-LIN8
const: MTO-PROD-LIN8
- title: MTO-PROD-Win16
const: MTO-PROD-Win16
custom_spec:
type: string
enum:
- vra8win
- vra8Lin
default: vra8win
title: Customization Name
description: Customization Name
SelectZone:
type: string
enum:
- Production
- Management
SelectFlavor:
type: string
enum:
- MTO-PROD-LARGE
- MTO-PROD-MEDIUM
- MTO-PROD-SMALL
title: Choose the size of VM
net_name:
type: string
enum:
- MTO-PROD-Net01
- MTO-DEV-Net01
default: MTO-PROD-Net01
title: Network Name
description: Network Name
resources:
Cloud_vSphere_Machine_1:
type: Cloud.vSphere.Machine
properties:
constraints:
- tag: '${input.SelectZone}'
image: '${input.os-image}'
flavor: '${input.SelectFlavor}'
hostName: '${input.MachineName}’
customizationSpec: '${input.custom_spec}'
networks:
- network: '${resource["DNS-Network"].id}'
assignment: static
DNS-Network:
type: Cloud.vSphere.Network
properties:
networkType: existing
constraints:
- tag: MTO-PROD1-Net0
Create workflow :-
My workflow in vRO may not be extraordinary but a simple solution to create DNS entry for Linux VM in DNS host .

The schema has three elements: DNS inputProperties, Build Command, and Invoke a PowerShell script.
The inputs and outputs from the DNS InputProperties element appear like below.

The Build Command element creates a Poweshell command that includes hostname and
ipAddress.
pshellCommand = cmdletName +' -Name "' + hostName + '" -ZoneName "' + zoneName + '" -CreatePtr -IPv4Address"'+ipAddress+'"'
The inputs and outputs from the Build Command element appear.

Save and close your workfllow.
Cross check your variable and it should looks like below.

Wait for the Data Collection: -
Go to the Cloud Assembly
Go to Infrastructure then go to Connections > Integrations.
Click Open on the embedded-VRO card.
Wait for the data collection.
A status message that indicates that data collection is complete appears.

Now time to create subscription for my pattern. I have created subscription to create DNS entry for Linux VM .

Deploying my Linux 7.x VM.
Go to Design > Blueprints
I have created blueprint as DNS Entry for Linux.

Click DEPLOY when you have entered required inputs.
Wait for your deployment to complete.
After your deployment is complete, click the Orchestrator Client tab to go to vRealize
Orchestrator.
Go to Activity > Workflow Runs.
Verify your workflow status.
Verify that the vRA-Add-DNS workflow status is Complete.

If the Status appears as Failed, a problem with your workflow exists. Verify that you set the PowerShell host correctly.
Click the Logs tab

Verify the log.
The log must include the host name and the IP address sent to PowerShell
We have given host name is “DNS40” And IP Address release by network profile ( vRA Internal IPM)

Cross verify deployed VM IP address and host name.

Now time to check if DNS entry has been created or not.

Now we have successfully deployed vm and able to create DNS entry Using vRealize Orchestrator.
Stay with me to read the next upcoming my blog 😀
I hope you enjoy reading this blog as much as I enjoyed writing it. Feel free to share this on social media if it is worth sharing.


Awesome and help full
ReplyDelete