views

Search This Blog

Wednesday, January 27, 2021

How to Join Linux VM to windows AD using ansible playbook When vRealize Automation 8.x Deploys a VM - Part-II

 This is continuing from my previous blog about Joining Windows VM to domain. In this blog, I will explain about How to Join Linux VM to windows AD using ansible playbook When vRealize Automation 8.x Deploys a VM . 

I am using RHEL 7.6 and Windows Server 2016  for domain controller .

First we need to prepare Linux VM template . let’s start  to prepare Linux VM template.


Prerequisite  for Linux VM template :-

1) NTP Configuration
2) resolve.conf file entries
3) AD server network reachability with VM 


Once  base Linux VM template creation completed thereafter we need to create  playbook and Ansible template.


Ansible Playbook and Template creation:-


Ansible playbook to perform AD join for the VM and same playbook will use in ansible template . 


I have used  linuxjoindomain.yml playbook  in my lab. My playbook to join Linux VM is


- name: Install Required Packages

  yum:

    name: "{{ package }}"

    state: present

  environment: "{{ proxy_env }}"


- name: Install PEXPECT With Easy_Install For CentOS 7

  easy_install:

    name: pexpect

  environment: "{{ proxy_env }}"

  when: (ansible_distribution == "CentOS" or ansible_distribution == "RedHat") and

          (ansible_distribution_major_version == "7")


- name: Install PEXPECT with PIP3.6 For CentOS 8

  pip:

    name: pexpect

    executable: pip3.6

  environment: "{{ proxy_env }}"

  when: (ansible_distribution == "CentOS" or ansible_distribution == "RedHat") and

          (ansible_distribution_major_version == "8")


- name: Checking Domain Join status

  command: id "{{ Join_User }}"

  register: ad_status

  changed_when: false

  ignore_errors: true


- name: Domain configs and Join {{ DomainName }}

  block:

    - name: Join {{ ansible_distribution }} {{ ansible_distribution_major_version }} into Domain {{ DomainName }}

      expect:

        command: /bin/bash -c "/usr/sbin/realm join --user={{ Join_User }} {{ DomainName }}"

        responses:

          Password for *: "{{ Join_User_Pass }}"


    - name: Allow user Login without FQDN

      lineinfile:

        backup: yes

        state: present

        dest: /etc/sssd/sssd.conf

        regexp: '^{{ item.search }}'

        line: '{{ item.replace }}'

      with_items:

        - { search: 'use_fully_qualified_names', replace: 'use_fully_qualified_names = False' }

        - { search: 'fallback_homedir', replace: 'fallback_homedir = /home/%u'}

        - { search: 'access_provider', replace: 'access_provider = simple'}

      notify: restart sssd

  when: ad_status.rc !=0


My Ansible template looks like this.


vRA Blueprint :-


Now time to create blueprint and my blueprint looks like below. I have used same blueprint for Linux 7.x and Linux  8.x deployment. 


name: Randhir_Linux

version: 1

formatVersion: 1

inputs:

  MachineName:

    type: string

    title: Name for the VM

    description: Enter the VM name

  os-image:

    type: string

    oneOf:

      - title: MTO-PROD-LIN7

        const: MTO-PROD-LIN7

      - title: MTO-PROD-LIN8

        const: MTO-PROD-LIN8

      - title: MTO-PROD-LIN7

        const: MTO-PROD-LIN7

  SelectZone:

    type: string

    enum:

      - Production

      - Management

  SelectFlavor:

    type: string

    enum:

      - MTO-PROD-LARGE

      - MTO-PROD-MEDIUM

      - MTO-PROD-SMALL

resources:

  Cloud_vSphere_Machine_1:

    type: Cloud.vSphere.Machine

    properties:

      constraints:

        - tag: '${input.SelectZone}'

      image: '${input.os-image}'

      flavor: '${input.SelectFlavor}'

      hostName: '${input.MachineName}'

      networks:

        - network: '${resource.Cloud_vSphere_Network_1.id}'

          assignment: static

  Cloud_vSphere_Network_1:

    type: Cloud.vSphere.Network

    properties:

      networkType: existing

      name: vranew

      networkCidr: 172.20.20.0/24

  Cloud_Ansible_Tower_1:

    type: Cloud.Ansible.Tower

    properties:

      host: '${resource.Cloud_vSphere_Machine_1.*}'

      account: MTO-Ansible

      jobTemplates:

        provision:

          - LinuxDomain (This Ansible template name)


I have used above YAML code to create blueprint and deployed VM  through it.


Let see, If we have successful job in ansible to join Linux VM to AD.


Yes, Job has been completed successfully and VM joint the domain . 


Once this has completed successfully, a computer object will be created in Active Directory in the default computers container.


Now time  to verify deployed VM if we are able to login through our AD ID.  We are going to preform couple of testing . 


1-    Id administrator ( AD  user) command to verify the administrator (AD User) account.


2- realm list command to show AD configuration.


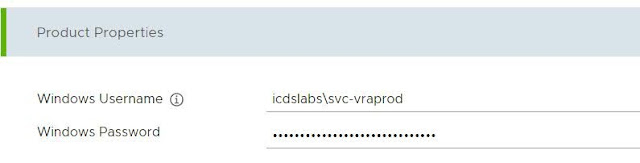
Now any AD user can access the RHEL machine (as standard user) . I have used SVC-vraprod AD user to login into Linux VM.


If you want to see  my Ansible playbook , please left comment in comment box.

Stay with me to read the next upcoming blog.
 I hope you enjoy reading this blog as much as I enjoyed writing it. Feel free to share this on social media if it is worth sharing. 


Monday, January 18, 2021

How to Join Windows VM to AD using ansible playbook When vRealize Automation 8.x Deploys a VM

  In my previous blog I have described for Using vRealize Orchestrator to Create a DNS Entry When vRealize Automation Deploys a VM

In this blog I am going to describe how to Join Windows VM to AD using ansible playbook through vRealize Automation 8 . 

Use case: -


There are also other simple solutions to join VM to AD through VM Customization Specifications But I have picked the use case, where client do not have VM Customization Specifications available on vCenter as per client compliance and security policy.  


 we need to integrate Ansible with vRealize Automation 8 before create blueprint. I have already explained in my previous blog. Please follow my previous blog for Ansible Integration.  
 

First, we need to prepare VM template for WinRM configuration.  This allow ansible to connect to guest VM. 


Let’s start to configure base OS VM. 


In this step you’re going to learn how to set up WinRm using certificate-based authentication using self-signed certificates so that Ansible can talk to them.


Enable PowerShell Remoting for Ansible WinRM :-

Windows Server 2016 or later servers have PowerShell Remoting enabled, it’s always a good idea to confirm that.


open up a PowerShell console as an administrator and run the following code snippet.


Set-Service -Name "WinRM" -StartupType Automatic

Start-Service -Name "WinRM"


Ensure Enable PS remoting is enabling on windows VM.


if (-not (Get-PSSessionConfiguration) -or (-not (Get-ChildItem WSMan:\localhost\Listener))) {


Enable-PSRemoting -SkipNetworkProfileCheck -Force


}


Enable Certificate-Based Authentication :-

Basic authentication is not enabled by default on a Windows host but can be enabled by running the following in PowerShell.


Set-Item -Path WSMan:\localhost\Service\Auth\Certificate -Value $true


Create a Local User Account :-

To use certificate-based authentication with Ansible, you must “map” a local user account to a certificate. You could use the local administrator account to do this but some time we cannot use local administrator so best way create a specific account to make management easier. 


Here I have create username as ansibletestuser. This user must be  part of Local Administrator Group


Create the Client Certificate :-


Need to enable certificate-based auth with Ansible, We  must have two certificates as a client certificate  and a server certificate.


To create the client certificate, you must create a private and a public key. Start by SSHing to the Ansible host and run the following openssl command. This command creates a private key in a file called cert_key.pem and a public key called cert.pem. 


cat > openssl.conf << EOL

distinguished_name = req_distinguished_name

[req_distinguished_name]

[v3_req_client]

extendedKeyUsage = clientAuth

subjectAltName = otherName:1.3.6.1.4.1.311.20.2.3;UTF8:ansibletestuser@localhost

EOL

export OPENSSL_CONF=openssl.conf

openssl req -x509 -nodes -days 3650 -newkey rsa:2048 -out cert.pem -outform PEM -keyout cert_key.pem -subj "/CN=ansibletestuser" -extensions v3_req_client

rm openssl.conf


Once above task get done then after verify the folder if you can see  cert_key.pem and cert.pem.

 Now time to import the Client Certificate

 First, you need to copy cert.pem  from Ansible tower to Base OS VM.


 Once you have the public certificate on the Windows host, import it into the Trusted Root Certification Authorities and Trusted People certificate stores using Import-Certificate as shown below.


pubKeyFilePath = 'C:\cert.pem'


$null = Import-Certificate -FilePath $pubKeyFilePath -CertStoreLocation 'Cert:\LocalMachine\Root'

$null = Import-Certificate -FilePath $pubKeyFilePath -CertStoreLocation 'Cert:\LocalMachine\TrustedPeople'


Create the Server Certificate :-


Ansible needs a certificate  with a key usage for server authentication. This certificate will be stored in the Windows host’s LocalMachine\My certificate store.


$hostname = hostname

$serverCert = New-SelfSignedCertificate -DnsName $hostName -CertStoreLocation 'Cert:\LocalMachine\My'


Create the Ansible WinRm Listener :-

Once We  have  created both certificates. We  need to create a WinRm listener on the base OS VM. This listener begins listening on port 5986 for incoming connections. Once created, this listener accepts incoming connections and will attempt to encrypt data using the server certificate created above.


$httpsListeners = Get-ChildItem -Path WSMan:\localhost\Listener\ | where-object { $_.Keys -match 'Transport=HTTPS' }


if ((-not $httpsListeners) -or -not (@($httpsListeners).where( { $_.CertificateThumbprint -ne $serverCert.Thumbprint }))) {

    $newWsmanParams = @{

        ResourceUri = 'winrm/config/Listener'

        SelectorSet = @{ Transport = "HTTPS"; Address = "*" }

        ValueSet    = @{ Hostname = $hostName; CertificateThumbprint = $serverCert.Thumbprint }

        # UseSSL = $true

    }

    $null = New-WSManInstance @newWsmanParams

}


Map the Client Certificate to the Local User Account :-


Ensure when Ansible connects to the Windows host using the server certificate, it will then carry out all instructions as a local user. In this case, all activity performed by Ansible will use the local user account, ansibletestuser.


$credential = New-Object -TypeName System.Management.Automation.PSCredential -ArgumentList $testUserAccountName, $testUserAccountPassword


$ansibleCert = Get-ChildItem -Path 'Cert:\LocalMachine\Root' | Where-Object {$_.Subject -eq 'CN=ansibletestuser'}


$params = @{

        Path = 'WSMan:\localhost\ClientCertificate'

        Subject = "$testUserAccountName@localhost"

        URI = '*'

        Issuer = $ansibleCert.Thumbprint

  Credential = $credential

        Force = $true

}

New-Item @params


Once we have followed each of these steps as shown, you should now be able to execute Ansible commands against a Windows host and we have completed our base OS VM.


Ansible Playbook and Template creation:-

Ansible playbook to perform AD join for the VM need to be setup in Ansible server.

I used same playbook and  created the  template  in Ansible.


---

- hosts: winclient

  ansible_facts: yes

  tasks:

  - name: Add node to domain

  win_domain_membership:

    dns_domain_name: "{{ domainans }}"   

    domain_admin_user: "{{ domainans }}\\{{ adusr }}"

    domain_admin_password: "{{adpass }}"

    hostname: "{{ ansible_facts['nodename'] }}"

    domain_ou_path: "{{ winadou }}"

    state: domain

  register: domain_state

- win_reboot:

  when:

  - domain_state.reboot_required is defined


Ansible Template


I am passing host variable from my ansible template. If you do not have Ansible template then you can define inside blueprint as well. 


ansible_connection: winrm

ansible_port: 5986

ansible_winrm_cert_key_pem: /usr/local/cert_key.pem

ansible_winrm_cert_pem: /usr/local/cert.pem

ansible_winrm_server_cert_validation: ignore

ansible_winrm_transport: certificate

winaddom: vrcloud.com

winadou: 'OU=vrcloddev,DC=vrcloud,DC=com'


vRA Blueprint :-

Now time to create blueprint and my blueprint looks like below.


name: Randhir_Windows

version: 1

formatVersion: 1

inputs:

  MachineName:

    type: string

    title: Name for the VM

    description: Enter the VM name

  os-image:

    type: string

    oneOf

        - title: MT0-Ansible

        const: MT0-Ansible

  SelectZone:

    type: string

    enum:

      - Production

      - Management

  SelectFlavor:

    type: string

    enum:

      - MTO-PROD-LARGE

      - MTO-PROD-MEDIUM

      - MTO-PROD-SMALL

resources:

  Cloud_vSphere_Machine_1:

    type: Cloud.vSphere.Machine

    properties:

      constraints:

        - tag: '${input.SelectZone}'

      image: '${input.os-image}'

      flavor: '${input.SelectFlavor}'

      hostName: '${input.MachineName}'

      networks:

        - network: '${resource.Cloud_vSphere_Network_1.id}'

          assignment: static

  Cloud_vSphere_Network_1:

    type: Cloud.vSphere.Network

    properties:

      networkType: existing

      name: vranew

      networkCidr: 192.168.20.0/24

  Cloud_Ansible_Tower_1:

    type: Cloud.Ansible.Tower

    properties:

      host: '${resource.Cloud_vSphere_Machine_1.*}'

      account: MTO-Ansible

      jobTemplates:

        provision

          - MTODomain (This  Ansible template name)


I have used above YAML code to create blueprint and deployed VM  through it. 


Let see if we have successful job in ansible to join VM to AD.


Yes, Job has been completed successfully and VM joint the domain as well you can see below.


Now we have successfully deployed vm and able to join AD.

Stay with me to read the next upcoming my blog, How to Join Linux VM to AD using Ansible playbook through vRealize Automation 8.x
 

I hope you enjoy reading this blog as much as I enjoyed writing it. Feel free to share this on social media if it is worth sharing. 


Deploy Windows VMs for vRealize Automation Installation using vRealize Suite Lifecycle Manager 2.0

Deploy Windows VMs for vRealize Automation Installation using vRealize Suite Lifecycle Manager 2.0 In this post I am going to describe ...