views

Search This Blog

Thursday, April 16, 2020

Set up vRealize Automation 8.1 Multi-tenancy


In this post we will learn how to  set up multi-organization tenancy for vRealize Automation 8.1using Lifecycle ManagervRealize Suite Lifecycle Manager.

vRealize Automation (vRA) 8.1, Vmware is offering support for dedicated infrastructure multitenancy.  This capability is enabled as a separate process in vRealize Suite Lifecycle Manager (LCM) once vRA is installed and configured.  There is no requirement to enable tenancy.  If tenancy is disabled, vRA 8.1 will operate exactly in the same way as 8.0 in terms of access and authorization.  Organisations can choose whether or not to enable tenancy based on the their need for the logical isolation provided by multi-tenancy


Enabling tenancy creates a new Provider organization.  The Provider Admin can create new tenants, add tenant admins, setup directory synchronization, and add users.  Tenant admins can also control directory synchronization for their tenant and will grant users access to services within their tenant.  Additionally, tenant admins will configure Policies, Governance, Cloud Zones, Profiles, access to content and provisioned resources; within their tenant.  A single shared SDDC or separate SDDCs can be used among tenants depending on available resources.  In addition to their other privileges, Provider Admins can also act as Tenant Admins.

Before enabling tenancy, there are a number of prerequisites.

The following is a high level description of the procedure to set up multi-tenancy for vRealize Automation including configuring DNS and certificates. 

Prerequisites
Install and configure Workspace ONE Accessversion 3.3.2.
Install and configure vRealize Suite Lifecycle Manager version 8.1

Procedure:

1- Create the required A and CNAME Type DNS records.


For single node deployments, the vRealize Automation FQDN points to the vRealize Automation appliance, and the Workspace ONE Access FQDN points to the Workspace ONE Access appliance.
For cluster deployments, both the Workspace ONE Access and vRealize Automation tenant-based FQDNs must point to their respective load balancers. Workspace ONE Access is configured with SSL Termination, so the certificate is applied on both the Workspace ONE Access cluster and load balancer. The vRealize Automation load balancer uses SSL passthrough, so the certificate is applied only on the vRealize Automation cluster.

2- Create or import the required multi-domain (SAN) certificates for both Workspace One 3.3.2 and vRA 8.1

You can create certificates in Lifecycle Manager using the Locker service that enables you to create certificates licenses, and passwords. Alternatively, you can use a CA server or some other mechanism to generate certificates. 

If you need to add or create additional tenants, you must recreate and apply your vRealize Automation and Workspace ONE Access tenants.


After you create your certificates, you can apply then with in Lifecycle Manager using the Lifecycle Operations feature. 


You must select the environment and product and then the Replace Certificate option on the righthand menu. 


Then you can select the product. When you replace a certificate, you must re-trust all associated products in your environment.


You must wait for the certificate to be applied and all services to restart before proceeding to the next step. (VIDM)


3- Apply the Workspace One SAN certificate on the Workspace ONE Access instance or cluster.


4- In vRealize Suite Lifecycle Manager 8.1, run the Enable Tenancy wizard to enable mult-tenancy and create an alias for the default master tenant.


5- Enabling tenancy requires that you create an alias for the provider organization master tenant or default tenant. After you enable tenancy, you can access Workspace ONE Access via the master tenant FQDN. 


6- Apply the vRA SAN certificates on the vRealize Automation instance or cluster. 
You can apply SAN certificates through the Lifecycle Manager Lifecycle Operations service. You need to view the details of the environment and then select Replace Certificates on the right menu. You must wait for the certificate replacement task to complete before adding tenants. As part of certificate replacement, vRealize Automation services will restart. 


7- In Lifecycle Manager, run the Add Tenants wizard to configure the desired tenants.


You add tenants using the Lifecycle Manager Tenant Management page located under Identity and Tenant Management. You can only add tenants for which you have previously configured certificates and DNS settings.
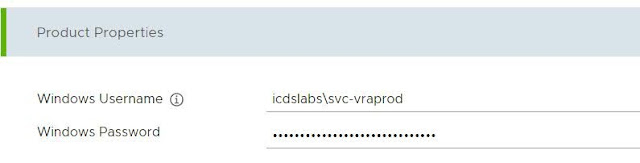
When creating a tenant, you must designate a tenant administrator


you can select the Active Directory connections for this tenant. 


You must also select product or product instance to which the tenant will be associated.


You need to run precheck validation to validate prerequisite.


Note - If you do not meet prerequisite then you will get error during precheck task . In my case DNS entry mapping was missing for VIDM and vRA.


Once Validation done then you need to click on create tenant


Now Time to monitor requests to get create new tenant for us.  


Tenant is created successfully and ready for test first time in vRA8.1


we are able to login on newly created  Tenant with Tenant administrator ID  :)


I hope you enjoy reading this blog as much as I enjoyed writing it. Feel free to share this on social media if it is worth sharing.

Thursday, April 2, 2020

GitHub Integration setup in vRealize Automation 8.X and Sync vRA Blueprint from GitHub

vRealize Automation (vRA) 8.x provides native integration to GitHub.com to share and sync your Blueprints and Action Based Extensibility (ABX) scripts.
vRealize Automation Cloud Assembly supports integration with GitLab and GitHub repositories so that you can manage blueprints and action scripts under source control.
 You need a valid GitHub token to configure GitHub integration in vRealize Automation Cloud Assembly .

Prerequisites
·       You must have access to GitHub.
·       Configure and store Blueprints to be integrated with GitHub correctly. Only valid blueprint are imported into GitHub.

First we need to Create a GitHub.com Personal Access Token below are the procedure to  Create a GitHub.com Personal Access. 

 Generate a Personal Access Token
Go to your GitHub account settings by following the steps below:

Go to https://github.com and log in, now you can see your profile image in the top right corner.

1- Click on that and select “Settings” to go to your public profile.


2- Go to “Developer Settings”


3- Choose “Personal access tokens”


or just visit this link below.

4-Select “Generate New token” button to your right


5-Now give the new token a description

6- Define the access scope for the token.


7- Generate your personal access token.


Procedure to Integrate GitHub on vRA Portal

Log into the vRA Portal, and select Cloud Assembly > Infrastructure > Connections > Integrations. Select Add Integration > GitHub


Select GitHub.  Enter the required information on the GitHub configuration page.
 The Server URL must remain as https://api.github.com and the Token field need to be  filled with the Token which you have  generated in GitHub.


Note that GitHub Enterprise is not supported in vRA 8.0. 


Click Validate to check the integration.


Click Add.


Results


GitHub is available for use in vRealize Automation Cloud Assembly blueprints. 


What to do next


You can now retrieve blueprints from GitHub.
We must create and save your blueprints in a specific structure in order for them to be detected by  GitHub.
 The following guidelines must be observed for all blueprints used with Git integration.
Create one or more designated folders for the blueprints. 

All blueprints must be stored within blueprint.yaml files. 


Ensure that the top of your blueprints include the name: and version: properties.


Once you have uploaded the blueprint  in GitHub  then after need to go back to vRA Portal in  the integration (  Cloud Assembly > Infrastructure > Connections > . Select Add Integration > GitHub)and navigate to the Projects tab. Select Add Project, select the project you want to integrate with and click Next.


Blueprint has been added, a sync will automatically run and you can see the below.


Now you can see   above image, the sync has found 1 Blueprint   on my GitHub repo and has synced this to vRA. The Blueprint is now available for consumption in the Cloud Assembly >Blueprint 


Now blueprint is ready to deployed Linux vm with apache web server using Ansible  (Ansible integration in vRealize Automation 8.0 )


I hope you enjoy reading this blog as much as I enjoyed writing it. Feel free to share this on social media if it is worth sharing.


Deploy Windows VMs for vRealize Automation Installation using vRealize Suite Lifecycle Manager 2.0

Deploy Windows VMs for vRealize Automation Installation using vRealize Suite Lifecycle Manager 2.0 In this post I am going to describe ...